Lamp harps are an important part of any lamp as they provide support for the shade and help evenly distribute the weight of the shade. Whether you are installing a new light harp, replacing an old one, or adjusting the height of your harp, it is important to understand the process to ensure your lights are functioning properly and looking their best. In this article, we'll discuss how to install, replace, and adjust light harps to help you maintain and enhance the functionality and beauty of your fixtures.
To install the light harp:
When installing a light harp, it's important to make sure it's the right size for your lampshade. The harp should be tall enough to hold the shade in place, but not so high that it extends over the top of the shade. To install the light harp, follow these steps:
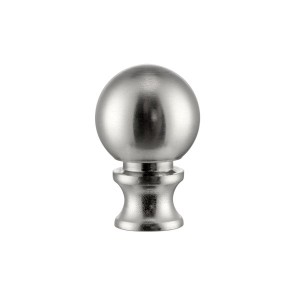
1. Remove the tip: Unscrew the tip from the top of the harp and set it aside.
2. Place the harp: Place the harp saddle on the light base and make sure it is securely in place.
3. Install the light fixture: Slide the shade onto the harp and secure it in place. Then, screw the top end back onto the harp, holding the shade in place.
To replace the light harp:
Over time, light harps can become bent, damaged, or simply worn out. When this happens, it's important to replace the harp to ensure your lights continue to work properly. To replace the light harp, follow these steps:
1. Remove the old harp: Unscrew the tip on the top of the harp and carefully remove the old harp from the lamp base.
2. Choose the right size: Choose a new light fixture that fits the size of your lampshade.
3. Install the new harp: Place the new harp saddle on the light base and make sure it is securely in place.
4. Install the light fixture: Slide the shade onto the new harp and secure it in place. Then, screw the top end back onto the harp, holding the shade in place.
Adjust the light harp:
Sometimes you may need to adjust the height of your light harp to accommodate different lampshades or to achieve a desired look for your lamp. To adjust the height of your light harp, follow these steps:
1. Unscrew the tip: Unscrew the tip from the top of the harp and set it aside.
2. Slide the harp: Carefully slide the harp up or down to adjust its height, making sure it is securely in place.
3. Reinstall the light fixture: Slide the shade onto the harp and secure it in place. Then, screw the top end back onto the harp, holding the shade in place.
All in all, installing, replacing, and adjusting a light harp is a simple process that can greatly enhance the functionality and aesthetics of your light. By following the steps below, you can ensure that your light harp is installed correctly, replacing and adjusting to different lampshades if necessary. With the right tools and techniques, you can maintain and improve the appearance and performance of your fixtures for years to come.
Types of Lighting Parts
Ready to Start Your Lighting Parts Project?
Post time: Mar-13-2024


